I've embarked on a project to lighten my '09 ER6n. This was precipitated by a garage knockdown that dented the tank, and my feeling that the bike seemed to carry 30-50 lbs of excess weight. Also, I always hated the look of the seat - like a whale flipper or a giant banana.
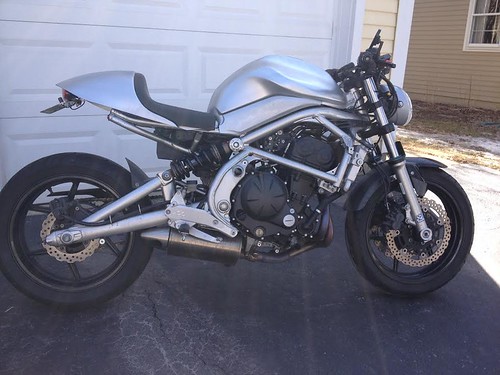
I decided to experiment to see whether radical cutting, grinding, paring and parts swapping would improve the feel of the bike, and whether the bike would still look good. In other words, would form follow function? Here's where I am now:
The first to go on the block were the footpeg brackets. These are beautiful castings, but they weigh nearly 5 lbs each.
![Image]()
I managed to get them down to less than 2 lbs (at least the left one):
![Image]()
![Image]()
Installed:
![Image]()
[
Here's how the right side turned out (the brake fluid reservoir is a small one from another bike clipped to the brake line):
![Image]()
I removed this boat anchor (about 7 lbs):
![Image]()
and replaced it with this (1/16" aluminum, later braced with angle stock - holds the ECU, a Ballistic battery and the grip heater components):
![Image]()
Like this. The aluminum panel fits snugly against the bottom of the seat pan, so not much water will get in there (just all over my back):
![Image]()
Since I removed the radiator cowls, I installed a coolant reservoir in the battery box. The Ballistic 8 cell battery saves another 7 lbs.
I kept the stock instruments, but switched to a Vrod-type headlight (uses the same bulb connectors as the stock headlight). It's about 2 lbs lighter than the stock headlight and brackets.
![Image]()
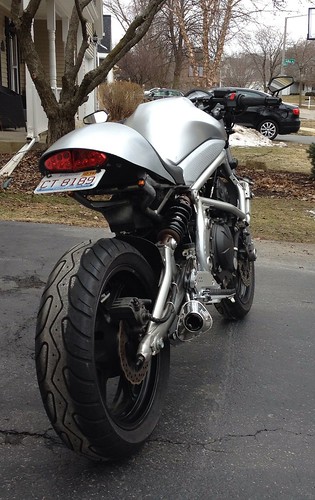
I'm not much of a painter, but at least I got the dents out of the tank, and got the bike together enough for a ride (which turned out to be muddy, due to our Spring thaw conditions). Before and after, mud and all:
![Image]()
![Image]()
![Image]()
![Image]()
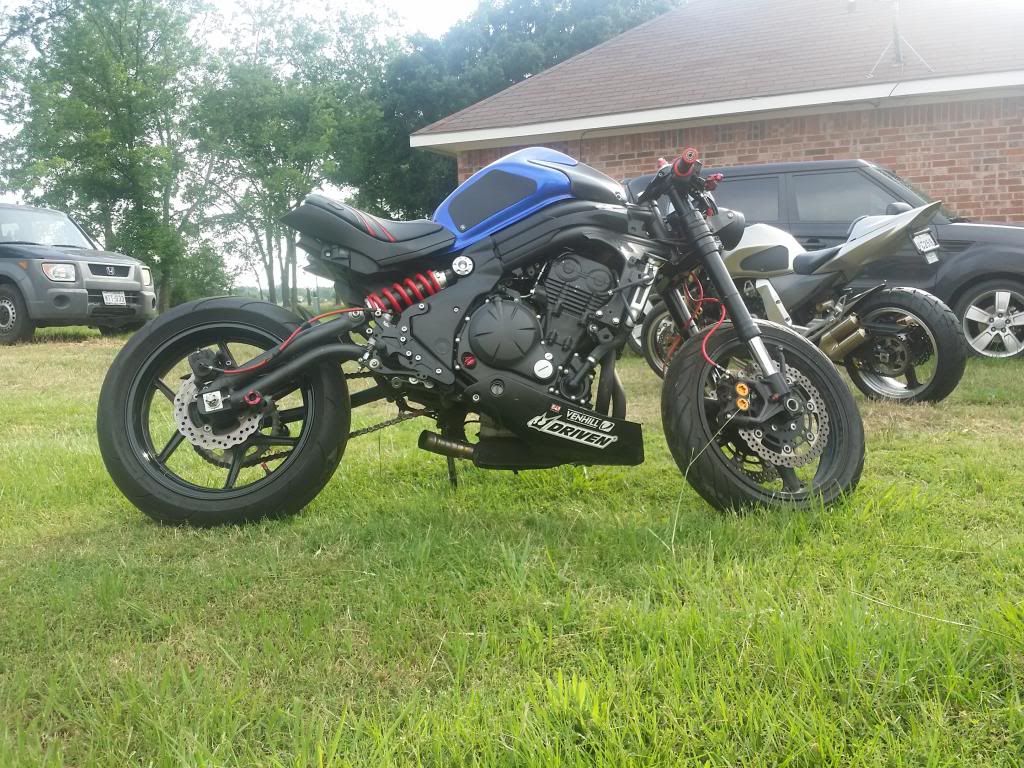
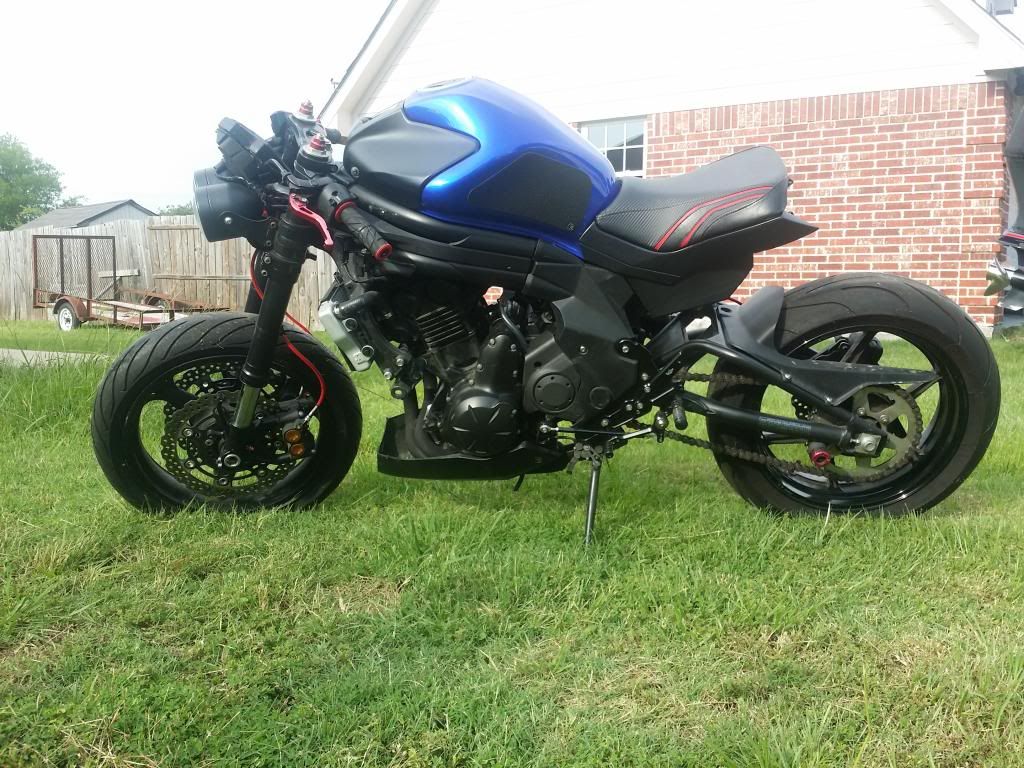
The seat pan (made of ABS plastic) and pad (skinned molded foam) are from Legendary Motorcycles. It's not as comfortable as stock, but I will probably get used to it in time. Pad looks good, anyhow. I still have some appearance improvements to make where it meets the tank, I think:
![Image]()
![Image]()
In the end, I calculate that I saved about 40 lbs. I've got a 60-lb box of body parts, nuts, bolts, brackets, etc., on my hands. Most of it will go to eBay.
The bike feels great, and runs like a champ after its winter sleep.
In conjuction with all this, I changed to a Progressive 428 rear shock and spring and installed Race Tech fork cartridge emulators and new front springs, and added a high-flow air filter. Aftermarket exhaust might be next.
I decided to experiment to see whether radical cutting, grinding, paring and parts swapping would improve the feel of the bike, and whether the bike would still look good. In other words, would form follow function? Here's where I am now:
The first to go on the block were the footpeg brackets. These are beautiful castings, but they weigh nearly 5 lbs each.

I managed to get them down to less than 2 lbs (at least the left one):


Installed:

Here's how the right side turned out (the brake fluid reservoir is a small one from another bike clipped to the brake line):

I removed this boat anchor (about 7 lbs):

and replaced it with this (1/16" aluminum, later braced with angle stock - holds the ECU, a Ballistic battery and the grip heater components):

Like this. The aluminum panel fits snugly against the bottom of the seat pan, so not much water will get in there (just all over my back):

Since I removed the radiator cowls, I installed a coolant reservoir in the battery box. The Ballistic 8 cell battery saves another 7 lbs.
I kept the stock instruments, but switched to a Vrod-type headlight (uses the same bulb connectors as the stock headlight). It's about 2 lbs lighter than the stock headlight and brackets.

I'm not much of a painter, but at least I got the dents out of the tank, and got the bike together enough for a ride (which turned out to be muddy, due to our Spring thaw conditions). Before and after, mud and all:


The seat pan (made of ABS plastic) and pad (skinned molded foam) are from Legendary Motorcycles. It's not as comfortable as stock, but I will probably get used to it in time. Pad looks good, anyhow. I still have some appearance improvements to make where it meets the tank, I think:


In the end, I calculate that I saved about 40 lbs. I've got a 60-lb box of body parts, nuts, bolts, brackets, etc., on my hands. Most of it will go to eBay.
The bike feels great, and runs like a champ after its winter sleep.
In conjuction with all this, I changed to a Progressive 428 rear shock and spring and installed Race Tech fork cartridge emulators and new front springs, and added a high-flow air filter. Aftermarket exhaust might be next.
")